Brother MFC-9120CN User Manual
Browse online or download User Manual for Multifunction Devices Brother MFC-9120CN. Brother MFC-9120CN User Manual
- Page / 264
- Table of contents
- TROUBLESHOOTING
- BOOKMARKS
Rated. / 5. Based on customer reviews
- USER’S GUIDE 1
- Brother numbers 3
- 1 page per job 4
- (USA and Canada) 5
- LIMITED WARRANTY 8
- Table of Contents 9
- Section II Fax 10
- 6 Receiving a fax 46 11
- 10 Polling 79 12
- 11 Printing reports 81 12
- Section III Copy 13
- Section IV Direct printing 13
- Section V Software 14
- Section VI Appendixes 14
- D Menu and features 194 15
- E Specifications 218 15
- F Glossary 237 15
- GIndex 241 15
- General I 17
- General information 1 18
- Accessing the 19
- Software User’s Guide 19
- Chapter 1 20
- Accessing Brother 21
- Control panel overview 1 22
- 34 5 6 7 8 23
- Data LED indications 1 26
- Loading paper and documents 2 27
- Loading paper in the manual 29
- Chapter 2 30
- Loading paper and documents 31
- Unprintable area 2 33
- Acceptable paper and 34
- Loading documents 2 39
- General Setup 3 41
- Volume settings 3 42
- Automatic daylight 43
- Ecology features 3 43
- LCD Contrast 3 44
- Dial Prefix 3 44
- Security features 4 45
- Changing the password for 46
- Setting up the public user 46
- Setting up restricted users 4 47
- Turning Secure Function 47
- Lock on/off 4 47
- Memory Security 48
- (MFC-9120CN only) 48
- Security features 49
- Setting Lock 4 50
- Restricting dialing 4 51
- Speed Dial restriction 4 52
- Section II 53
- Sending a fax 5 54
- Broadcasting 55
- (black & white only) 55
- Additional sending 56
- Electronic cover page 57
- (black & white only) 5 57
- Contrast 5 58
- Changing Fax Resolution 5 58
- Dual access 59
- Real Time Transmission 5 59
- Overseas Mode 5 60
- Delayed Fax 60
- Delayed batch transmission 60
- Manual transmission 5 61
- Receiving a fax 6 62
- Receiving a fax 63
- Using receive modes 6 64
- Receive Mode settings 6 65
- Easy Receive 6 66
- Setting the Print Density 6 66
- Additional receiving 67
- Printing a fax from the 68
- Receiving faxes into memory 68
- (black & white only) 6 68
- Telephone line 69
- Distinctive Ring 7 70
- Very important! 71
- Caller ID 7 72
- Connecting an external 73
- TAD (telephone 73
- Connections 7 74
- Recording an outgoing 74
- Special line considerations 7 75
- External and extension 76
- Fax Receive Code 7 77
- Telephone Answer Code 7 77
- Changing the Remote Codes 7 78
- Dialing and storing numbers 8 79
- Storing numbers 8 80
- Storing One Touch Dial 81
- Storing Speed Dial numbers 8 82
- Dialing and storing numbers 83
- Changing One Touch and 84
- Speed Dial numbers 8 84
- Setting up Groups for 85
- Broadcasting 8 85
- Chapter 8 86
- Dialing access codes and 87
- Tone or Pulse (Canada only) 8 87
- Remote Fax Options 88
- Paging 9 89
- Fax Storage 9 89
- PC Fax Receive 9 90
- Changing Remote Fax 91
- Remote retrieval 9 92
- Retrieving fax messages 9 93
- Changing the Fax Forwarding 93
- Remote fax commands 9 94
- Polling 10 95
- Polled transmit 96
- Printing reports 11 97
- Reports 11 98
- How to print a report 11 99
- Chapter 11 100
- Copy III 101
- Making copies 12 102
- Copy options 103
- (temporary settings) 103
- Using the Options key 12 104
- Brightness 12 105
- Improving copy quality 12 105
- Color saturation 12 106
- IMPORTANT 107
- Out of memory 108
- Direct printing IV 109
- Before using 110
- PictBridge 110
- Using PictBridge 13 110
- Printing images 13 111
- Printing images with 112
- Secure Function 112
- Lock 2.0 enabled 112
- (MFC-9320CW only) 112
- Connecting a camera 114
- Understanding the 114
- Printing data directly 116
- Chapter 14 120
- Software V 121
- How to read the HTML 122
- User’s Guide 122
- Appendixes VI 123
- Safety and legal A 124
- To use the machine safely A 125
- Safety and legal 127
- International ENERGY STAR 134
- Qualification Statement A 134
- Trademarks A 136
- Options B 137
- Memory board B 138
- Troubleshooting and routine 140
- Telephone line or connections 141
- Receiving Faxes 141
- Receiving Faxes (continued) 142
- Sending faxes 143
- Handling incoming calls 143
- Menu access difficulties 143
- Copy difficulties 144
- Printing difficulties 144
- Scanning difficulties 145
- Software difficulties 145
- Paper handling difficulties 145
- Print quality difficulties 146
- Network difficulties 146
- Improving the print quality C 149
- (3.7 in.) 151
- EFGHIJKLMN 155
- Setting Dial Tone detection C 156
- Telephone line interference C 156
- The toner cartridge 157
- (C)=Cyan 162
- Journal report C 163
- Routine maintenance C 170
- Cleaning the scanner C 171
- Cleaning the drum unit C 175
- Cleaning the paper pick-up 179
- Calibration C 180
- Auto Registration C 181
- Manual Registration C 181
- Replacing a Toner cartridge C 184
- Drum units C 189
- Replacing periodic 203
- Machine Information C 203
- Reset functions C 204
- Packing and shipping 205
- Menu and features D 210
- How to access the menu 211
- Menu table D 212
- Menu and features 213
- -9320CW) 223
- -9120CN) 230
- Entering text D 232
- Specifications E 234
- Specifications 235
- Print media E 236
- Interfaces E 241
- PictBridge (MFC-9320CW) E 242
- Computer requirements E 244
- Consumable items E 245
- Ethernet wired network E 246
- Authentication method E 250
- Encryption methods E 251
- Network key E 251
- Push Button Configuration 252
- Glossary F 253
- Glossary 255
- (Canada only) 263
Summary of Contents
Page 1 - USER’S GUIDE
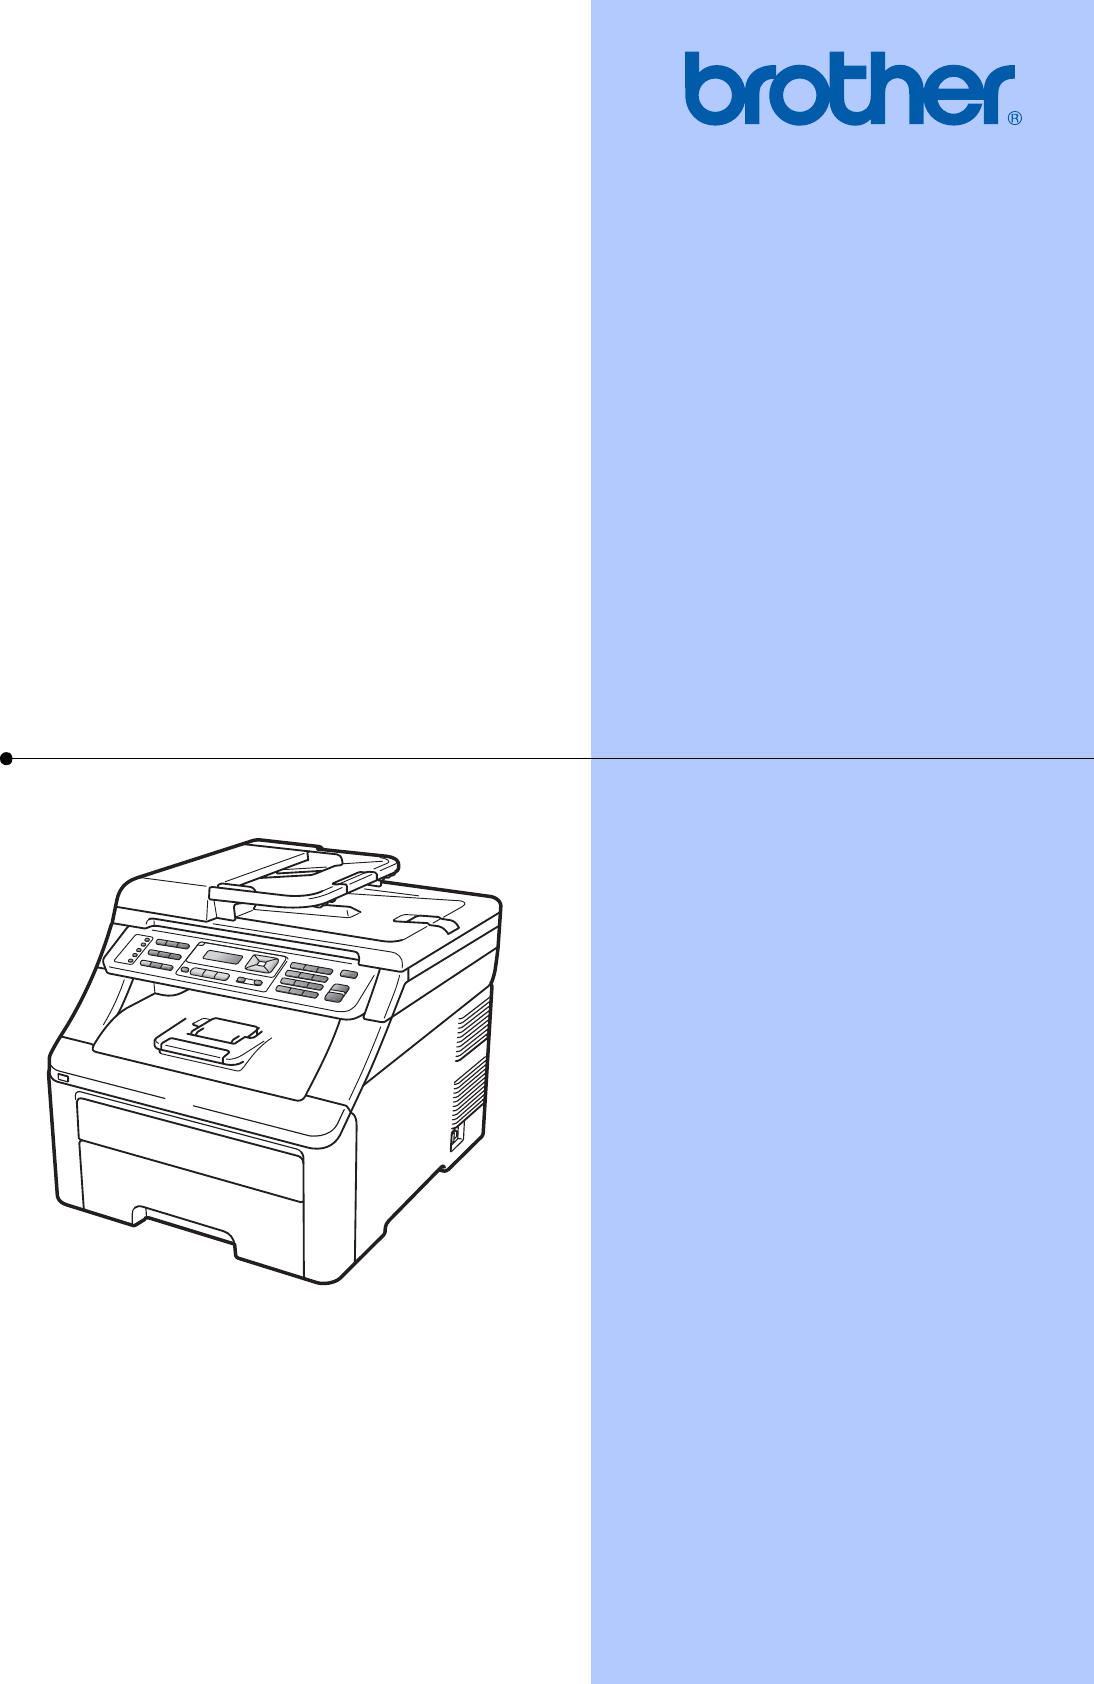
USER’S GUIDEMFC-9120CNMFC-9320CW Version AUSA/CAN
Page 2
viii4 Security features 29Secure Function Lock 2.0 (MFC-9320CW only) ...29Setting the password for the
Page 3 - Brother numbers
Chapter 1184
Page 4 - 1 page per job
Section IIICopy IIIMaking copies 86
Page 5 - (USA and Canada)
8612How to copy 12Entering copy mode 12Press (Copy) to enter Copy mode. 1 Stack/Sort2 Copy ratio and Copy layout3 Contrast4 Quality5 Number of copies
Page 6
Making copies8712Copy options (temporary settings)12When you want to quickly change the copy settings temporarily for the next copy, use the temporary
Page 7
Chapter 1288Using the Options key 12Use the Options key to quickly set the following copy settings temporarily for the next copy.Press Menu selections
Page 8 - LIMITED WARRANTY
Making copies8912Improving copy quality 12You can choose from a range of quality settings. The default setting is Auto. AutoAuto is the recommended m
Page 9 - Table of Contents
Chapter 1290To change the default setting follow the steps below:a Press Menu, 3, 3. Copy3.Contrastb Press a or b to increase or decrease the contrast
Page 10 - Section II Fax
Making copies9112Making N in 1 copies (page layout) 12You can reduce the amount of paper used when copying by using the N in 1 copy feature. This allo
Page 11 - 6 Receiving a fax 46
Chapter 1292If you are copying from the scanner glass:12Insert your document face down in the direction shown below: 2 in 1 (P) 2 in 1 (L) 4 in 1
Page 12 - 11 Printing reports 81
Section IVDirect printing IVPrinting photos from a digital camera (MFC-9320CW only)94Printing data from a USB Flash memory drive (MFC-9320CW only)99
Page 13 - Section IV Direct printing
ix6 Receiving a fax 46Choose the correct Receive Mode ...46Using receive modes ...
Page 14 - Section VI Appendixes
9413 Your Brother machine supports the PictBridge standard, allowing you to connect to and print photos directly from any PictBridge compatible digita
Page 15 - GIndex 241
Printing photos from a digital camera (MFC-9320CW only)9513a Press Menu, 5, 3. USB Direct I/F3.PictBridgeb To set the PictBridge settings, press a or
Page 16
Chapter 1396IMPORTANT• To prevent damage to your machine, do not connect any device other than a digital camera or USB flash memory drive to the USB d
Page 17 - General I
Printing photos from a digital camera (MFC-9320CW only)9713NoteIf your ID has restricted options, the following messages appear on the LCD. e The LCD
Page 18 - General information 1
Chapter 1398Connecting a camera as a storage device13Even if your camera is not in PictBridge mode, or does not support PictBridge, you can connect yo
Page 19 - Software User’s Guide
991414With the Direct Print feature, you do not need a computer to print data. You can print by just plugging your USB Flash memory drive into the mac
Page 20 - Chapter 1
Chapter 14100Printing data directly from the USB Flash memory drive (MFC-9320CW only)14a Connect your USB Flash memory drive to the USB direct interfa
Page 21 - Accessing Brother
Printing data from a USB Flash memory drive (MFC-9320CW only)10114f Press Black Start or Color Start to print the data.IMPORTANT• To prevent damage to
Page 22 - Control panel overview 1
Chapter 14102NoteIf your ID has the restricted options, the following messages appear on the LCD. e The file names appear if the password is correct.f
Page 23 - 34 5 6 7 8
Printing data from a USB Flash memory drive (MFC-9320CW only)10314i Press the dial pad key to enter the number of copies you want.Press OK. Copies=1j
Page 24
x8 Dialing and storing numbers 63How to dial ...
Page 25
Chapter 14104
Page 26 - Data LED indications 1
Section VSoftware VSoftware and Network features 106
Page 27 - Loading paper and documents 2
10615The User’s Guide on the CD-ROM includes the Software User’s Guide and Network User’s Guide for features available when connected to a computer (f
Page 28
Section VIAppendixes VISafety and legal 108Options 121Troubleshooting and routine maintenance 124Menu and features 194Specifications 218Glossary 237
Page 29 - Loading paper in the manual
108AChoosing a location APut your machine on a flat, level, stable surface that is free of vibration and shocks, such as a desk. Put the machine near
Page 30 - Chapter 2
Safety and legal109ATo use the machine safely APlease keep these instructions for later reference and read them before attempting any maintenance. If
Page 31 - Loading paper and documents
110 DO NOT use flammable substances, any type of spray, or an organic solvent/liquid that contains alcohol or ammonia to clean the inside or outside o
Page 32
Safety and legal111ACAUTION After you have just used the machine, some internal parts of the machine will be extremely hot. To prevent injury, when yo
Page 33 - Unprintable area 2
112 To prevent injuries, be careful not to put your fingers in the areas shown in the illustrations. IMPORTANTThe fuser unit is marked with a caution
Page 34 - Acceptable paper and
Safety and legal113AImportant safety instructions A1 Read all of these instructions.2 Save them for later reference.3 Follow all warnings and instruct
Page 35
xiSection III Copy12 Making copies 86How to copy...
Page 36
11416 Never push objects of any kind into this product through cabinet slots, since they may touch dangerous voltage points or short out parts resulti
Page 37
Safety and legal115AStandard telephone and FCC notices AThese notices are in effect on models sold and used in the United States only.When programming
Page 38
116WARNING For protection against the risk of electrical shock, always disconnect all cables from the wall outlet before servicing, modifying or insta
Page 39 - Loading documents 2
Safety and legal117AIMPORTANT• Changes or modifications not expressly approved by Brother Industries, Ltd. could void the user’s authority to operate
Page 40
118International ENERGY STAR® Qualification Statement AThe purpose of the International ENERGY STAR® Program is to promote the development and popular
Page 41 - General Setup 3
Safety and legal119ALibtiff Copyright and License AUse and CopyrightCopyright© 1988-1997 Sam LefflerCopyright© 1991-1997 Silicon Graphics, Inc.Permiss
Page 42 - Volume settings 3
120Trademarks AThe Brother logo is a registered trademark of Brother Industries, Ltd.Brother is a registered trademark of Brother Industries, Ltd.Mult
Page 43 - Ecology features 3
121BBOptions BThis machine has the following optional accessory. You can increase the capabilities of the machine with this item.Options BSO-DIMM memo
Page 44 - Dial Prefix 3
122Memory board BMFC-9320CW and MFC-9120CN have 64 MB of standard memory. They also have one slot for optional memory expansion. You can expand the me
Page 45 - Security features 4
Options123Be Hold the SO-DIMM by the edges and align the notches in the SO-DIMM with the protrusions in the slot. Insert the SO-DIMM diagonally (1), t
Page 46 - Setting up the public user
xiiSection V Software15 Software and Network features 106How to read the HTML User’s Guide...
Page 47 - Lock on/off 4
124CTroubleshooting CIMPORTANTFor technical help, you must call the country where you bought the machine. Calls must be made from within that country.
Page 48 - (MFC-9120CN only)
Troubleshooting and routine maintenance125CTelephone line or connectionsDifficulties SuggestionsDialing does not work. Check for a dial tone.Change To
Page 49 - Security features
126Cannot receive a fax.(continued)Another device or service at your location may be answering the call before your Brother machine answers. To test t
Page 50 - Setting Lock 4
Troubleshooting and routine maintenance127CSending faxesDifficulties SuggestionsPoor sending quality. Try changing your resolution to Fine or S.Fine.
Page 51 - Restricting dialing 4
128Copy difficultiesDifficulties SuggestionsCannot make a copy. Make sure that Copy is illuminated. (See Entering copy mode on page 86.) (For MFC-9
Page 52 - Speed Dial restriction 4
Troubleshooting and routine maintenance129CThe headers or footers appear when the document displays on the screen but they do not show up when it is p
Page 53 - Section II
130How do I print on envelopes? You can load envelopes from the manual feed slot. Your application must be set up to print the envelope size you are u
Page 54 - Sending a fax 5
Troubleshooting and routine maintenance131CThe network scanning feature does not work.The network PC Fax Receive feature does not work.The network pri
Page 55 - (black & white only)
132The network scanning feature does not work.The network PC Fax Receive feature does not work.The network printing feature does not work.(continued)(
Page 56 - Additional sending
Troubleshooting and routine maintenance133CImproving the print quality CIf you have a print quality problem, print a test page first (Menu, 4, 2, 3).
Page 57 - (black & white only) 5
xiiiReplacing the consumable items...166Replacing a Toner cartridge ...
Page 58 - Changing Fax Resolution 5
134White streaks or bands down the page Wipe the windows of all four LED heads with a dry lint free soft cloth. (See Cleaning the LED heads on page
Page 59 - Real Time Transmission 5
Troubleshooting and routine maintenance135CColored lines across the page If colored lines appear at 1.2 in. (30 mm) intervals, replace the toner car
Page 60 - Delayed batch transmission
136Toner scatter or toner stain Check the machine's environment. Conditions such as high humidity and high temperatures may cause this print qu
Page 61 - Manual transmission 5
Troubleshooting and routine maintenance137CAll one color Identify the color causing the problem and put in a new drum unit. (See Replacing the drum
Page 62 - Receiving a fax 6
138Wrinkle Change to the recommended type of paper. Make sure that the back cover is closed properly. Make sure that two gray levers inside the ba
Page 63 - Receiving a fax
Troubleshooting and routine maintenance139CCurled or wavy Choose Reduce Paper Curl mode in the printer driver when you do not use our recommended pa
Page 64 - Using receive modes 6
140Setting Dial Tone detection CSetting the Dial Tone to Detection will shorten the Dial Tone detect pause.a (USA) Press Menu, 0, 4.(Canada) Press Men
Page 65 - Receive Mode settings 6
Troubleshooting and routine maintenance141CError and maintenance messages CAs with any sophisticated office product, errors may occur and consumable i
Page 66 - Setting the Print Density 6
142Cooling DownWait for a whileThe temperature of the drum unit or toner cartridge is too hot. The machine will pause its current print job and go int
Page 67 - Additional receiving
Troubleshooting and routine maintenance143CDrum Error The corona wire on the drum unit needs to be cleaned.Clean the corona wire on the drum unit. (Se
Page 69 - Telephone line
144No Response/Busy The number you dialed does not answer or is busy.Verify the number and try again.No Toner The toner cartridge or the drum unit and
Page 70 - Distinctive Ring 7
Troubleshooting and routine maintenance145CRegistration Registration failed. Press Black Start or Color Start and try again.Do one of the following:
Page 71 - Very important!
1461(X) shows the toner cartridge or drum unit color that is near the end of its life. (K)=Black, (Y)=Yellow, (M)=Magenta, (C)=Cyan.Replace Toner The
Page 72 - Caller ID 7
Troubleshooting and routine maintenance147CTransferring your faxes or Fax Journal report CIf the LCD shows: Init Unable XX Print Unable XX Scan Una
Page 73 - TAD (telephone
148Document jams CIf the document is jammed, follow the steps below.IMPORTANTAfter removing a jammed document, check that no paper scraps are left in
Page 74 - Recording an outgoing
Troubleshooting and routine maintenance149CPaper jams CTo clear paper jams, please follow the steps in this section.IMPORTANTPlease confirm that you h
Page 75 - Special line considerations 7
150NotePulling out the jammed paper downwards allows you to remove the paper easier. c Make sure the paper is below the maximum paper mark (b) of the
Page 76 - External and extension
Troubleshooting and routine maintenance151CPaper is jammed at the back of the machineCIf the LCD shows Jam Rear, a paper jam occurred behind the face-
Page 77 - Telephone Answer Code 7
152Paper is jammed inside the machine CIf the LCD shows Jam Inside, follow these steps:a Turn off the machine’s power switch. Unplug the telephone lin
Page 78 - Changing the Remote Codes 7
Troubleshooting and routine maintenance153C• To avoid print quality problems, DO NOT touch the shaded parts shown in the illustrations. d Pull out
Page 79 - Dialing and storing numbers 8
Section IGeneral IGeneral information 2Loading paper and documents 11General Setup 25Security features 29
Page 80 - Storing numbers 8
154Routine maintenance CClean the outside and inside of the machine regularly with a dry, lint-free cloth. When you replace the toner cartridge or the
Page 81 - Storing One Touch Dial
Troubleshooting and routine maintenance155Ce Wipe the inside and the outside of the paper tray with a dry, lint-free soft cloth to remove dust. f Re-l
Page 82 - Storing Speed Dial numbers 8
156Cleaning the LED heads CWARNING DO NOT use cleaning materials that contain ammonia, alcohol, any type of spray, or any type of flammable substance
Page 83 - Dialing and storing numbers
Troubleshooting and routine maintenance157CCleaning the corona wires CIf you have print quality problems, clean the corona wires as follows:a Turn off
Page 84 - Speed Dial numbers 8
158d Clean the primary corona wire inside the drum unit by gently sliding the green tab from left to right and right to left several times. NoteBe sur
Page 85 - Broadcasting 8
Troubleshooting and routine maintenance159CCleaning the drum unit CSmall spots on the printed pages CIf your printout has any small white or colored s
Page 86 - Chapter 8
160e Press Black Start or Color Start. The machine will pull in the piece of paper and start cleaning the drum unit. Drum CleaningPlease Wait f When t
Page 87 - Tone or Pulse (Canada only) 8
Troubleshooting and routine maintenance161Cc See the print sample to identify the color causing the problem. The color of the spots is the color of th
Page 88 - Remote Fax Options
162f Turn the drum unit gear by hand while looking at the surface of the OPC drum (1). g When you have found the mark on the drum that matches the pri
Page 89 - Fax Storage 9
Troubleshooting and routine maintenance163Ci Slide each drum unit and toner cartridge assembly into the machine. Make sure that you match the toner ca
Page 90 - PC Fax Receive 9
21Using the documentation1Thank you for buying a Brother machine! Reading the documentation will help you make the most of your machine.Symbols and co
Page 91 - Changing Remote Fax
164d Wipe the two pick-up rollers (1) inside of the machine to remove dust. e Put the paper tray back in the machine.f Plug the machine’s power cord b
Page 92 - Remote retrieval 9
Troubleshooting and routine maintenance165CAuto Registration CRegistration CIf solid areas of color or images have cyan, magenta or yellow fringes, y
Page 93 - Changing the Fax Forwarding
166Replacing the consumable items CThe following messages appear on the LCD in the Ready mode. These messages provide advanced warnings to replace the
Page 94 - Remote fax commands 9
Troubleshooting and routine maintenance167CYou will need to replace certain parts and clean the machine regularly.1A4 or Letter size single-sided page
Page 95 - Polling 10
168Note• Go to http://www.brother.com/original/index.html for instructions on how to return your used consumable items to the Brother collection progr
Page 96 - Polled transmit
Troubleshooting and routine maintenance169Cb Fully open the top cover by lifting up on the handle (1). IMPORTANTWhen the scanner is open, you cannot o
Page 97 - Printing reports 11
170IMPORTANT• We recommend that you place the drum unit and toner cartridge assembly on a clean, flat, level, stable surface with a sheet of disposabl
Page 98 - Reports 11
Troubleshooting and routine maintenance171Cf Unpack the new toner cartridge. Gently shake it from side to side several times to distribute the toner e
Page 99 - How to print a report 11
172h Put the new toner cartridge firmly into the drum unit until you hear it lock into place. NoteMake sure that you put in the toner cartridge proper
Page 100 - Chapter 11
Troubleshooting and routine maintenance173CDrum units COrder No. DR-210CL 4 pc. Drum Set or single drums DR-210CL-BK, DR-210CL-CMYA new drum unit can
Page 101 - Copy III
General information31Accessing the Software User’s Guide and Network User’s Guide1This User’s Guide does not contain all the information about the mac
Page 102 - Making copies 12
174Drum End Soon messages C Drums End SoonIf the LCD shows Drums End Soon, it means the 4 drum units are near the end of their life. Buy a new drum un
Page 103 - (temporary settings)
Troubleshooting and routine maintenance175Cb Fully open the top cover by lifting up on the handle (1). IMPORTANTWhen the scanner is open, you cannot o
Page 104 - Using the Options key 12
176IMPORTANT• We recommend that you place the drum unit and toner cartridge assembly on a clean, flat surface with a sheet of disposable paper or clot
Page 105 - Improving copy quality 12
Troubleshooting and routine maintenance177Cf Put the toner cartridge firmly into the new drum unit until you hear it lock into place. IMPORTANTMake su
Page 106 - Color saturation 12
178Resetting the drum counter CWhen you replace a drum unit with a new one, you need to reset the drum counter by completing the following steps:a Plu
Page 107 - IMPORTANT
Troubleshooting and routine maintenance179Cc Take out all the drum unit and toner cartridge assemblies. IMPORTANT• We recommend that you place the dru
Page 108 - Out of memory
180d Hold the green handle of the belt unit and lift the belt unit up, then pull it out.IMPORTANTTo avoid print quality problems, DO NOT touch the sha
Page 109 - Direct printing IV
Troubleshooting and routine maintenance181Ce Unpack the new belt unit and put the new belt unit in the machine.f Slide each drum unit and toner cartri
Page 110 - Using PictBridge 13
182When you replace a belt unit with a new one, you need to reset the belt unit counter by completing the following steps:Ca Plug the machine’s power
Page 111 - Printing images 13
Troubleshooting and routine maintenance183Cc Take out all the drum unit and toner cartridge assemblies. IMPORTANT• We recommend that you place the dru
Page 112 - (MFC-9320CW only)
If you need to call Customer ServicePlease complete the following information for future reference:Model Number: MFC-9120CN and MFC-9320CW (Circle you
Page 113
Chapter 14How to find scanning instructions 1There are several ways you can scan documents. You can find the instructions as follows:Software User’s G
Page 114 - Understanding the
184d Hold the green handle of the belt unit and lift the belt unit up, then pull it out.IMPORTANTTo avoid print quality problems, DO NOT touch the sha
Page 115
Troubleshooting and routine maintenance185Ce Remove the orange packing material and discard it.NoteThis step is only necessary when you are replacing
Page 116 - Printing data directly
186g Unpack the new waste toner box and put the new waste toner box in the machine. h Put the belt unit in the machine.i Slide each drum unit and tone
Page 117
Troubleshooting and routine maintenance187CReplacing periodic maintenance partsCThe periodic maintenance parts will need to be replaced regularly to m
Page 118
188Checking the remaining life of parts CYou can see the machine’s parts life on the LCD.a (For MFC-9320CW) Press Menu, 8, 3.(For MFC-9120CN) Press Me
Page 119
Troubleshooting and routine maintenance189CHow to reset the machine Ca (USA) Press Menu, 0, 6.(Canada) Press Menu, 0, 7. Initial Setup6.Resetb Press a
Page 120 - Chapter 14
190WARNING This machine is heavy and weighs approximately 50.5 lb. (22.9 kg). To prevent injuries use at least two people to lift the machine. Be care
Page 121 - Software V
Troubleshooting and routine maintenance191Ce Attach the protective cover to each of the drum unit and toner cartridge assemblies. f Put each assembly
Page 122 - User’s Guide
192j Reinstall the original packing material in the machine. k Close the top cover. l Put the waste toner box and one drum unit and toner cartridges a
Page 123 - Appendixes VI
Troubleshooting and routine maintenance193Cp Put the four carton trays on the top. NoteIf you are returning your machine to Brother as part of the Exc
Page 124 - Safety and legal A
General information51How to find scanning instructions 1There are several ways you can scan documents. You can find the instructions as follows:Softwa
Page 125 - To use the machine safely A
194DOn-screen programmingDYour machine has been designed to be easy to use. The LCD provides on-screen programming using the menu keys.We have created
Page 126
Menu and features195DHow to access the menu mode Da Press Menu.b Choose an option.MFC-9120CN: Press 1 for General Setup menu. Press 2 for Fax menu.
Page 127 - Safety and legal
196Menu table DThe factory settings are shown in Bold with an asterisk.Choose & OK Choose & OK to accept to exit Main Menu Subme
Page 128
Menu and features197D1.GeneralSetup(Continued)3.Volume 1 .Ring OffLowMed*HighAdjusts the ring volume.262.Beeper OffLowMed*HighAdjusts the volume level
Page 129
1981.GeneralSetup(Continued)8.Document Scan1.Glass ScanSize A4Letter*Adjusts the scan area of the scanner glass to the size of the document.392.File S
Page 130
Menu and features199DMain Menu Submenu Menu Selections Options Descriptions Page2.Fax 1.Setup Receive(In Fax mode only)1.Ring Delay 0001020304*Sets th
Page 131
2002.Fax(Continued)2.Setup Send(In Fax mode only)(Continued)3.Delayed Fax — Sets the time of day in 24 hour format that the delayed faxes will be sent
Page 132
Menu and features201D2.Fax(Continued)4.Report Setting 1.TransmissionOnOn+ImageOff*Off+ImageSets initial setup for Transmission Verification Report.812
Page 133
2022.Fax(Continued)0.Miscellaneous 1.CompatibilityHigh*NormalBasic(for VoIP)Adjusts the equalization for transmission difficulties.VoIP service provid
Page 134 - Qualification Statement A
Menu and features203D3.Copy(Continued)4.Color Adjust 1.Red b -nnnno+ ab -nnnon+ ab -nnonn+ a*b -nonnn+ ab -onnnn+ aAdjusts the red color for copies. 9
Page 135
Chapter 16Control panel overview 1MFC-9120CN and MFC-9320CW have similar keys. 1234 56101101/07 15:30 FaxRes:Standard1234 56101101/07 15:30 FaxRes:
Page 136 - Trademarks A
2044.Printer(Continued)6.Auto Regist. 1.Registration1.Start Adjust the print position of each color automatically.1652.Exit2.Frequency LowMedium*HighO
Page 137 - Options B
Menu and features205D5.USB DirectI/F(MFC-9320CW only)(Continued)1.Direct Print(Continued)3.Multiple Page1in1*2in14in19in116in125in11 in 2x2 pages1 in
Page 138 - Memory board B
2065.USB DirectI/F(MFC-9320CW only)(Continued)3.PictBridge 1.Paper Size Letter*A4B5A5B6A6Sets the paper size when printing data from a camera with usi
Page 139
Menu and features207D6.Print Reports (MFC-9320CW)1.Transmission 1.View on LCD — You can view the Transmission Verification Report for your last 200 o
Page 140 - Troubleshooting and routine
208Main MenuSubmenu Menu Selections Options Descriptions Page5.Network (MFC-9120CN)1.TCP/IP 1.Boot Method Auto*StaticRARPBOOTPDHCPChooses the BOOT met
Page 141 - Receiving Faxes
Menu and features209D5.Network(MFC-9120CN)(Continued)3.Scan toFTP— Color 100 dpi*Color 200 dpiColor 300 dpiColor 600 dpiGray 100 dpiGray 200 dpiGray 3
Page 142 - Receiving Faxes (continued)
2107.Network(MFC-9320CW)1.Wired LAN1.TCP/IP 1.Boot MethodAuto*StaticRARPBOOTPDHCPChooses the BOOT method that best suits your needs.See Network User’s
Page 143 - Menu access difficulties
Menu and features211D7.Network(MFC-9320CW )(Continued)1.Wired LAN(Continued)2.Ethernet — Auto*100B-FD100B-HD10B-FD10B-HDChooses the Ethernet link mode
Page 144 - Printing difficulties
2127.Network(MFC-9320CW )(Continued)2.WLAN(Continued)1.TCP/IP(Continued)9.APIPA On*OffAutomatically allocates the IP address from the link-local addre
Page 145 - Paper handling difficulties
Menu and features213D7.Network(MFC-9320CW)(Continued)2.WLAN(Continued)6.Set to Default— 1.Reset2.ExitRestore the wireless network settings to factory
Page 146 - Network difficulties
General information71 34 5 6 7 89101101/07 15:30 FaxRes:Standard34 5 6 7 89101101/07 15:30 FaxRes:Standard
Page 147
214Main Menu Submenu Menu Selections Options Descriptions Page8.Machine Info.(MFC-9320CW)6.Machine Info.(MFC-9120CN)1.Serial No. — — You can check the
Page 148
Menu and features215D0.Initial Setup(Continued)6.Reset (in USA) 7.Reset (in Canada) 1.Network 1.Reset2.ExitRestores all network settings to factory de
Page 149 - Improving the print quality C
216Entering text DWhen setting certain menu selections, such as the Station ID, you will need to type text characters. The dial pad keys have letters
Page 150
Menu and features217DSpecial characters and symbolsPress l, # or 0, then press d or c to move the cursor to the symbol or character you want. Press OK
Page 151 - (3.7 in.)
218EGeneral E1When making a copy from one sheetSpecifications EPrinter Type LEDPrint Method Electrophotographic LEDMemory Capacity 64 MB LCD (liquid c
Page 152
Specifications219ETemperature Operating: 50 °F to 90.5 °F (10 to 32.5 °C)Storage: 32 °F to 104 °F (0 to 40 °C)Humidity Operating: 20 to 80% (without c
Page 153
220Print media E1For labels, we recommend removing printed pages from the output paper tray immediately after they exit the machine to avoid the possi
Page 154
Specifications221EFax E1‘Pages’ refers to the ‘Brother Standard Chart No. 1’ (a typical business letter, Standard resolution, JBIG code). Specificatio
Page 155 - EFGHIJKLMN
222Copy E1The copy speed may change depending on the type of document you copy.Copy Speed (Monochrome)Up to 17 pages/minute (Letter size)1Copy Speed (
Page 156 - Telephone line interference C
Specifications223EScan E1For the latest driver updates for the Mac OS X you are using, visit us at http://solutions.brother.com/.2Maximum 1200 × 1200
Page 157 - The toner cartridge
Chapter 181 One Touch keysThese 4 keys give you instant access to 8 previously stored numbers.ShiftLets you access One Touch numbers 5 to 8 when held
Page 158
224Print E1Print only via network.2For the latest driver updates for the Mac OS X you are using, visit us at http://solutions.brother.com/.3The print
Page 159
Specifications225EInterfaces E1Your machine has a Hi-Speed USB 2.0 interface. The machine can also be connected to a computer that has a USB 1.1 inter
Page 160
226PictBridge (MFC-9320CW) ECompatibility Supports the Camera & Imaging Products Association PictBridge standard CIPA-001. Visit http://www.cipa.j
Page 161
Specifications227EDirect Print feature (MFC-9320CW) E1PDF data that includes a JBIG2 image file, a JPEG2000 image file or a transparency file is not s
Page 162 - (C)=Cyan
228Computer requirements E1Internet Explorer® 5.5 or greater.2For WIA, 1200x1200 resolution. Brother Scanner Utility enables to enhance up to 19200 x
Page 163 - Journal report C
Specifications229EConsumable items E1Approx. cartridge yield is declared in accordance with ISO/IEC 19798.2Contains 4 pc. Drum Set3Contains 1 pc. Blac
Page 164
230Ethernet wired network ENetwork board model nameNC-6700hLAN You can connect your machine to a network for Network Printing, Network Scanning, PC Fa
Page 165
Specifications231E1PC Fax Send for Mac2Print only via network.3Mac OS X 10.3.9 or greater (mDNS)4For the latest driver updates for the Mac OS X you ar
Page 166
232Ethernet wireless network (MFC-9320CW only) ENetwork board model nameNC-7500WLAN You can connect your machine to a network for Network Printing, Ne
Page 167
Specifications233E1PC Fax Send for Mac2Only printing for Windows Server® 2003 and Windows Server® 20083Mac OS X 10.3.9 or greater (mDNS)4For the lates
Page 168
General information917DialpadUse these keys to dial telephone and fax numbers and as a keyboard for entering information into the machine.(Canada only
Page 169
234Authentication and encryption for wireless users only EAuthentication method EThe Brother machine supports the following methods: Open systemWirel
Page 170 - Routine maintenance C
Specifications235EEncryption methods EEncryption is used to secure the data that is sent over the wireless network. The Brother machine supports the f
Page 171 - Cleaning the scanner C
236Wireless one-push configuration EIf your wireless access point supports either SecureEasySetup™, Wi-Fi Protected Setup (PBC1) or AOSS™, you can con
Page 172
237FThis is a comprehensive list of features and terms that appear in Brother manuals. Availability of these features depends on the model you purchas
Page 173
238Distinctive RingA subscriber service purchased from the telephone company that gives you another telephone number on an existing telephone line. Th
Page 174
Glossary239FMenu modeProgramming mode for changing your machine’s settings.OCR (optical character recognition)The bundled ScanSoft™ PaperPort™ 11SE wi
Page 175 - Cleaning the drum unit C
240Tel Index ListA listing of names and numbers stored in One Touch and Speed Dial memory, in numerical order.Temporary settingsYou can choose certain
Page 176
Index241GGAAccessories and supplies ... iiAddress book ... 8, 63, 64ADF (automatic document feede
Page 177
242DData Ident-A-Call ...54Delayed batch transmission ...44Dialinga pause ...
Page 178
243GFax/Tel modeanswering at extension telephones ...61easy receive ...50F/T ring time (double-ring) ...
Page 179 - Cleaning the paper pick-up
Chapter 110Data LED indications 1The Data LED (light emitting diode) will flash depending on the machine’s status. LED Machine Status Description Read
Page 180 - Calibration C
244OOne touchchanging ...68setting up ...65using ...
Page 181 - Manual Registration C
245GRRedial/Pause key ... 64, 71Reducingcopies ...87incoming faxes ...
Page 182
246Temporary copy settings ...87Text, entering ...216Toner Save ...
Page 183
EQUIPMENT ATTACHMENT LIMITATIONS (Canada only)NOTICEThis product meets the applicable Industry Canada technical specifications.NOTICEThe Ringer Equiva
Page 184 - Replacing a Toner cartridge C
Brother International Corporation100 Somerset Corporate BoulevardP.O. Box 6911Bridgewater, NJ 08807-0911 USABrother International Corporation (Canada)
Page 185
1122Loading paper and print media2The machine can feed paper from the standard paper tray.When you put paper into the paper tray, note the following:
Page 186
Chapter 212c Fan the stack of paper well to avoid paper jams and misfeeds. d Put paper in the tray, and make sure that the paper is below the maximum
Page 187
Loading paper and documents132Loading paper in the manual feed slot 2You can load envelopes and special print media one at a time into this slot. Use
Page 188
iBrother numbersIMPORTANTFor technical help, you must call the country where you bought the machine. Calls must be made from within that country. Regi
Page 189 - Drum units C
Chapter 214d Using both hands, put one piece of paper in the manual feed slot with the print side face up until the front edge of the paper touches th
Page 190
Loading paper and documents152c Open the manual feed slot cover. d Using both hands, slide the manual feed slot paper guides to the width of the paper
Page 191
Chapter 216Note• Put the paper into the manual feed slot with the side to be printed face up.• Make sure that the print media is straight and in the p
Page 192
Loading paper and documents172Unprintable area 2Unprintable area for faxes and copies 2The figures below show unprintable areas.NoteThis unprintable a
Page 193
Chapter 218Acceptable paper and other print media2Print quality may vary according to the type of paper you are using.You can use the following types
Page 194
Loading paper and documents192Paper capacity of the paper trays 21Folio size is 8.5 in. × 13 in. (215.9 mm x 330.2 mm)Recommended paper specifications
Page 195
Chapter 220Handling and using special paper 2The machine is designed to work well with most types of xerographic and bond paper. However, some paper v
Page 196
Loading paper and documents212Envelopes 2Most envelopes will be suitable for your machine. However, some envelopes may have feed and print-quality pro
Page 197
Chapter 222• with sealing flaps that have not been folded at purchase• with sealing flaps as shown in figure below • with each side folded as shown in
Page 198
Loading paper and documents232Loading documents 2Using the automatic document feeder (ADF) 2The ADF can hold up to 35 pages and feeds each sheet indiv
Page 199
iiOrdering accessories and supplies For best quality results use only genuine Brother accessories, which are available at most Brother retailers. If y
Page 200
Chapter 224Using the scanner glass 2You can use the scanner glass to fax, copy or scan pages of a book one page at a time.Documents can be up to 8.5 i
Page 201
2533Mode Timer 3The machine has three mode keys on the control panel: Fax, Scan, and Copy. You can set how much time the machine takes after the last
Page 202
Chapter 326Volume settings 3Ring volume 3You can choose a ring volume level from a range of settings, from High to Off.While in Fax mode press or
Page 203 - Machine Information C
General Setup273Automatic daylight savings time3You can set the machine to change automatically for Daylight Savings Time. It will set itself forward
Page 204 - Reset functions C
Chapter 328LCD Contrast 3You can change the contrast to make the LCD look lighter or darker.a Press Menu, 1, 6. General Setup6.LCD Contrastb Press a t
Page 205 - Packing and shipping
2944Secure Function Lock 2.0 (MFC-9320CW only)4Secure Function Lock lets you restrict Public access to the following machine functions: Fax Tx Fax R
Page 206
Chapter 430Changing the password for the administrator 4a Press Menu, 1, 7, 1. Security1.Function Lockb Press a or b to choose Set Password.Press OK.c
Page 207
Security features314Setting up restricted users 4You can set up users with restrictions and a password for functions that are available to them. You c
Page 208
Chapter 432Switching Users 4This setting allows you to switch between registered restricted users or Public mode when Secure Function Lock is turned o
Page 209
Security features334Setting up the password 4Note• If you have already set the password, you will not need to set it, again.• If you forget the Memor
Page 210 - Menu and features D
iiiNotice - Disclaimer of Warranties (USA and Canada)BROTHER’S LICENSOR(S), AND THEIR DIRECTORS, OFFICERS, EMPLOYEES OR AGENTS (COLLECTIVELY BROTHER’S
Page 211 - How to access the menu
Chapter 434Setting Lock 4Setting Lock lets you set a password to stop other people from accidentally changing your machine settings.Make a careful not
Page 212 - Menu table D
Security features354Turning Setting Lock on/off 4If you enter the wrong password when following the instructions below, the LCD will show Wrong Passwo
Page 213 - Menu and features
Chapter 436Speed Dial restriction 4a Press Menu, 2, 6, 3. Dial Restrict.3.Speed Dialb Press a or b to choose Off, Enter # twice or On.Press OK.c Press
Page 214
Section IIFax IISending a fax 38Receiving a fax 46Telephone services and external devices 53Dialing and storing numbers 63Remote Fax Options (black &
Page 215
385How to fax 5Entering fax mode 5To enter fax mode press (Fax), and the key will glow blue.Sending a fax from the ADF 5Using the ADF to send your fa
Page 216
Sending a fax395g Your machine will automatically send the fax.NoteWhen faxing multiple pages from the scanner glass, real time transmission should be
Page 217
Chapter 540Canceling a Broadcast in progress 5a Press Menu, 2, 7.The LCD will show the Broadcast job number followed by the fax number (or name) being
Page 218
Sending a fax415Electronic cover page (black & white only) 5This feature will not work unless you have already programmed your Station ID. (See th
Page 219
Chapter 542Send a cover page for all faxes 5You can set the machine to send a cover page whenever you send a fax.a Make sure you are in Fax mode .b P
Page 220
Sending a fax435To change the default Fax Resolution setting5a Make sure you are in Fax mode .b Press Menu, 2, 2, 2. Setup Send2.Fax Resolutionc Pres
Page 221
ivBrother® Digital Color One-Year Limited Warranty and Replacement Service (USA Only)Who is covered:This limited warranty (“warranty”) is givenonly t
Page 222
Chapter 544Sending in real time for all faxes 5a Make sure you are in Fax mode .b Press Menu, 2, 2, 5. Setup Send5.Real Time TXc Press a or b to choo
Page 223 - -9320CW)
Sending a fax455Checking and canceling waiting jobs 5Check which jobs are still waiting in the memory to be sent. If there are no jobs, the LCD will s
Page 224
466Choose the correct Receive Mode 6The correct Receive Mode is determined by the external devices and telephone subscriber services (Voice Mail, Dist
Page 225
Receiving a fax476To set the receive mode follow the instructions below:a Press Menu, 0, 1. Initial Setup1.Receive Modeb Press a or b to choose the re
Page 226
Chapter 648Using receive modes 6Some receive modes answer automatically (Fax Only and Fax/Tel). You may want to change the Ring Delay before using the
Page 227
Receiving a fax496Receive Mode settings 6Ring Delay 6The Ring Delay setting sets the number of times the machine rings before it answers in Fax Only a
Page 228
Chapter 650Easy Receive 6If Easy Receive is On: 6The machine can receive a fax automatically, even if you answer the call. When you see Receiving on t
Page 229
Receiving a fax516Additional receiving operations6Printing a reduced incoming fax 6If you choose On, the machine automatically reduces each page of an
Page 230 - -9120CN)
Chapter 652Printing a fax from the memory 6If you are using the Fax Storage feature (Menu, 2, 5, 1), you can still print a fax from the memory when yo
Page 231
5377Telephone line services7Voice Mail 7If you have Voice Mail on the same telephone line as your Brother machine, Voice Mail and the Brother machine
Page 232 - Entering text D
vBrother® Digital Color One-Year Limited Warranty and Replacement Service (USA Only)Machine and/or accompanying Consumableand Accessory Items and use
Page 233
Chapter 754Distinctive Ring 7Distinctive Ring is a function of your Brother machine that allows a person with one line to receive fax and voice calls
Page 234 - Specifications E
Telephone services and external devices557Before you choose the ring pattern to register7You can only register one Distinctive Ring pattern with the m
Page 235 - Specifications
Chapter 756Turning off distinctive ring 7a Press Menu, 2, 0, 2. Miscellaneous2.Distinctiveb Press a or b to choose Off.Press OK.c Press Stop/Exit.Note
Page 236 - Print media E
Telephone services and external devices577Viewing the Caller ID List 7Your machine stores information for the last thirty calls in the Caller ID list.
Page 237
Chapter 758Connections 7The external TAD must be plugged into the back of the machine, into the jack labeled EXT. Your machine cannot work properly if
Page 238
Telephone services and external devices597Special line considerations 7Roll over telephone lines 7A roll over telephone system is a group of two or mo
Page 239
Chapter 760Plug one end of the second telephone line cord for your TAD into the L2 jack of the two-line TAD. Plug the other end into the EXT. jack on
Page 240
Telephone services and external devices617For Fax/Tel mode only 7When the machine is in Fax/Tel mode, it will use the F/T Ring Time (pseudo/double-rin
Page 241 - Interfaces E
Chapter 762Changing the Remote Codes 7The preset Fax Receive Code is l51. The preset Telephone Answer Code is #51. If you are always disconnected when
Page 242 - PictBridge (MFC-9320CW) E
6388How to dial 8You can dial in any of the following ways.Manual dialing 8Use the dial pad to enter all the digits of the telephone or fax number. On
Page 243
viBROTHER MULTIFUNCTION CENTER / FAX MACHINE LIMITED WARRANTY (Canada only)Pursuant to the limited warranty of 1 year from the date of purchase for la
Page 244 - Computer requirements E
Chapter 864Search 8You can search alphabetically for names you have stored in the One Touch and Speed Dial memories. (See Storing One Touch Dial numbe
Page 245 - Consumable items E
Dialing and storing numbers658Storing One Touch Dial numbers 8Your machine has 4 One Touch keys where you can store 8 fax or telephone numbers for aut
Page 246 - Ethernet wired network E
Chapter 866e If you want to save a fax/scan resolution along with the number, choose one of the following: If you selected Fax/Tel in step b, press a
Page 247
Dialing and storing numbers678If you downloaded I-FAX, Fax/Tel and E-mail optionsa Press (Address Book) and enter a three-digit Speed Dial location nu
Page 248
Chapter 868Changing One Touch and Speed Dial numbers 8If you try to store a One Touch or Speed Dial number over an existing number, the LCD will show
Page 249
Dialing and storing numbers698e Press d or c to position the cursor under the character you want to change, and then press Clear/Back to delete it.Rep
Page 250 - Authentication method E
Chapter 870If you downloaded I-FAX, Fax/Tel and E-mail optionsa Press Menu, 2, 3, 3. Address Book3.Setup Groupsb Choose an empty location where you wa
Page 251 - Network key E
Dialing and storing numbers718Dialing access codes and credit card numbers 8You can combine more than one Quick Dial number when you dial. This featur
Page 252 - Push Button Configuration
729Remote Fax Options ARE NOT available for color fax.Remote Fax Options let you receive faxes while you are away from the machine.You can use only on
Page 253 - Glossary F
Remote Fax Options (black & white only)739Paging 9When Paging is chosen, the machine dials the cell phone number you programmed. This activates y
Page 254
viiTable of ContentsSection I General1 General information 2Using the documentation...
Page 255 - Glossary
Chapter 974PC Fax Receive 9If you turn on the PC Fax Receive feature your machine will store received faxes in memory and send them to your PC automat
Page 256
Remote Fax Options (black & white only)759Changing Remote Fax Options9If received faxes are left in your machine’s memory when you change to anot
Page 257
Chapter 976Remote retrieval 9The remote retrieval feature lets you retrieve your stored fax messages when you are not at the machine. You can call you
Page 258
Remote Fax Options (black & white only)779Retrieving fax messages 9a Dial your fax number from a telephone or another fax machine using touch ton
Page 259
Chapter 978Remote fax commands 9Follow the commands below to access features when you are away from the machine. When you call the machine and enter y
Page 260
791010Polling lets you set up your machine so other people can receive faxes from you, but they pay for the call. It also lets you call somebody else’
Page 261
Chapter 1080Polled transmit (black & white only)10Polled transmit lets you set up your machine to wait with a document so another fax machine can
Page 262
811111Fax reports 11You need to set up the Transmission Verification Report and Journal Period using the Menu keys.Transmission verification report 11
Page 263 - (Canada only)
Chapter 1182Fax Journal 11You can set the machine to print a fax journal (activity report) at specific intervals (every 50 faxes, 6, 12 or 24 hours, 2
Page 264
Printing reports8311How to print a report 11MFC-9320CW:a Press Menu, 6. Select ab or OK6.Print Reportsb Do one of the following: Press a or b to choo
More documents for Multifunction Devices Brother MFC-9120CN

Brother MFC-9120CN User Manual
(31 pages)

Brother MFC-9120CN User Manual
(216 pages)

Brother MFC-9120CN User Manual
(1 pages)

Brother MFC-9120CN User Manual
(247 pages)

Brother MFC-9120CN User Manual
(1 pages)

Brother MFC-9120CN User Manual
(31 pages)

Brother MFC-9120CN User Manual
(10 pages)

Brother MFC-9120CN User Manual
(31 pages)

Brother MFC-9120CN User Manual
(10 pages)

Brother MFC-9120CN User Manual
(31 pages)

Brother MFC-9120CN User Manual
(255 pages)

Brother MFC-9120CN User Manual
(215 pages)

Brother MFC-9120CN User Manual
(31 pages)
Related products and manuals for Multifunction Devices Brother MFC-9120CN
 (219 pages)
© 2020, manymanuals.com. All rights reserved. | 0.949 s |
 Manymanuals.com
 Manymanuals.de
 Manymanuals.fr
 Manymanuals.it
 Manymanuals.pl
 Manymanuals.cz
 Manymanuals.es
 Manymanuals-pt.com
Comments to this Manuals